


 mongoose 스키마 등록
commentsModule
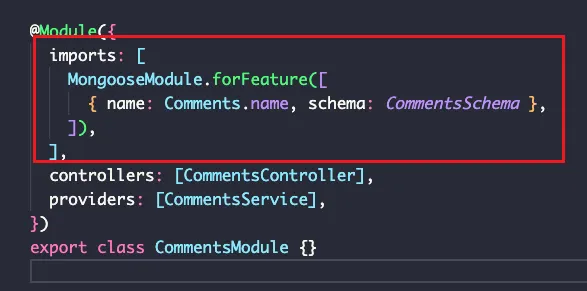

imports로 몽구스에 스키마를 등록한다.
commentsService
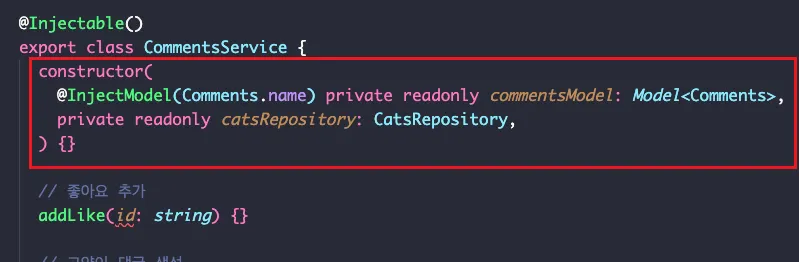

CommentsService에 의존성 추가
commentsModel 과 catsRepository
Mongoose모델은 @InjectModel 데코레이터를 사용하는 이유?
•
보통 프로바이더를 주입을 받을 때, @Injectable 데코레이터가 달린 프로바이더는 NestJS에서 관리를 하기 때문에 바로 사용이 가능하다.
•
하지만, Mongoose나 TypeORM같은 외부라이브러리는 NestJS가 관리하지 못하기 때문에, @InjectModel 같은 데코레이터로 명시적 지정을 해줘야된다.
createComments 메소드 정의
// 고양이 댓글 생성
async createComments(id: string, reqDTO: CommentsCreateDTO) {
try {
// 게시물의 작성자 고양이를 찾기
const targetCat =
await this.catsRepository.findCatByIdWithoutPassword(id);
// CommentsCreateDTO를 구조분해 할당
const { contents, author } = reqDTO;
const validatedAuthor =
await this.catsRepository.findCatByIdWithoutPassword(author);
const newComment = new this.commentsModel({
author: validatedAuthor._id,
contents,
info: targetCat._id,
});
return await newComment.save();
} catch (error) {
throw new BadRequestException(error.message);
}
}
JavaScript
복사
•
catsRepository.findCatByIdWithoutPassword
// Id로 고양이 찾으면서 비번은 제외하고 가져오기
async findCatByIdWithoutPassword(catId: string | Types.ObjectId): Promise<Cat | null> {
const cat = await this.catModel.findById(catId).select('-password');
return cat;
}
JavaScript
복사
여기서 특이한 점은 매개변수에
| 파이프 문법으로 string을 받거나 Types.ObjectId를 받거나 로직이 가능해서,
두 타입 모두 허용된다. 몽고디비역시 두 타입 모두 허용한다.
commentsService.getAllComments
// 모든 댓글 불러오기
async getAllComments() {
try {
const comments = await this.commentsModel.find();
return comments;
} catch (error) {
throw new BadRequestException(error.message);
}
}
JavaScript
복사
모든 댓글을 불러오는 api
commentsService.addlike
// 좋아요 추가
async addLike(id: string) {
try {
const comment = await this.commentsModel.findById(id);
comment.likeCount += 1;
return await comment.save();
} catch (error) {}
}
JavaScript
복사
좋아요 추가 로직, 수를 변경하고 save()까지 꼭!
commentsController.addlike
@ApiOperation({ summary: '좋아요 수 올리기' })
@Patch(':id')
async addLike(@Param('id') id: string) {
return this.commentsService.addLike(id);
}
JavaScript
복사
원래는 @Post메소드 였는데, @Patch로 변경함
포스트 보다는 패치가 더 적절함
Nest의 조인 기능 →populate
몽고디비를 사용하는 NestJS환경에서는 가상화 필드를 통해서 조인작업이 가능하다.
모듈 설정
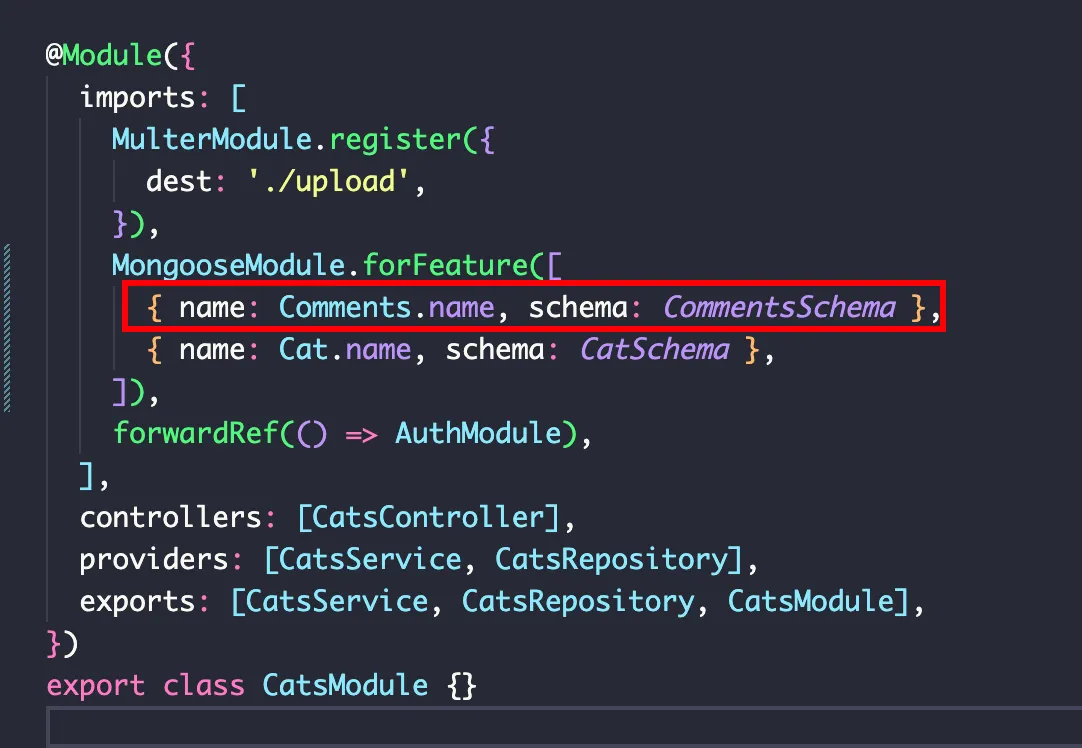
Cat에서 Comments 스키마를 사용할려면 ( 조인같은 기능으로 ),
Mongoose.forFeature에 위처럼 Comments 스키마를 추가한다.
스키마 수정 (catSchema)
// DB에 정의되어 있지 않은 필드를 사용하고 싶을때, 가상화를 사용한다.
_CatSchema.virtual('readOnlyData').get(function (this: Cat) {
return {
id: this.id,
email: this.email,
name: this.name,
imgUrl: this.imgUrl,
};
});
_CatSchema.virtual('comments', {
ref: 'comments',
localField: '_id', // driving table 필드
foreignField: 'info', // driven table 필드
});
_CatSchema.set('toObject', { virtuals: true });
_CatSchema.set('toJSON', { virtuals: true });
export const CatSchema = _CatSchema;
JavaScript
복사
본 코드 아래에 위 코드를 작성한다. 여기서 유심히 봐야할 것음
comments 가상화 필드이다.
ref: 참조하는 모델 이름 ‘comments’, 몽고디비에 저장된 collection이름을 적어줘야 된다.
localField: 조인시 driving 테이블에서 연결되는 필드 ‘cat의 _id 필드’
foreignField: 조인시 driven 테이블에서 연결되는 필드 ‘comments의 info’
populate 기능을 사용할려면…

이 설정이 들어가 있어야 된다.
catsRepository.finAll() 수정
@Injectable()
export class CatsRepository {
constructor(
@InjectModel(Cat.name) private readonly catModel: Model<Cat>,
@InjectModel(Comments.name) private readonly commentsModel: Model<Comments>,
) {}
// 모든 고양이를 조회하는 로직, comments도 같이
async findAll() {
const result = await this.catModel
.find()
.populate({ path: 'comments', model: this.commentsModel });
return result;
}
JavaScript
복사
→ Comments 모델을 의존성 주입
→ populate()에 ‘Cat’ 스키마에 ‘comments’ 필드를 다른 컬렉션 ’Comments’ 를 조회해서 채워준다.
→ path: 'comments', model: this.commentsModel
path는 Cat 스키마에서 comments 필드를 가리키고, model에서 commentsModel을 사용해서 Comments 컬렉션에서 관련 데이터를 가져온다.
•
확인
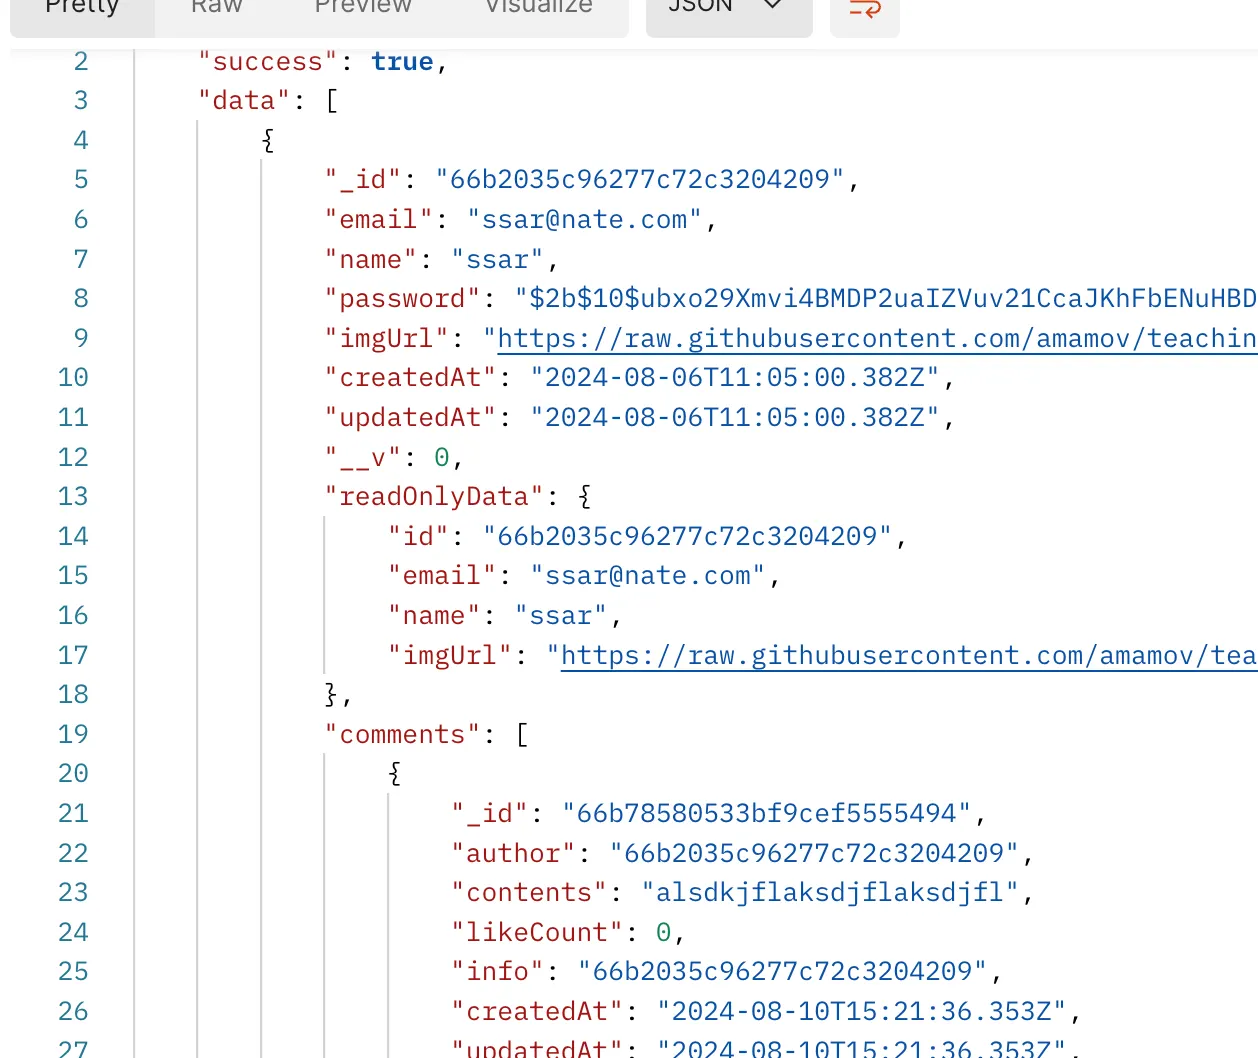
너무 많은 데이터가 날라오는데, readonlyData로 필요한 필드만 반환할 수 있게 하면 좋을 것 같다.
catSchema - readOnly 필드
1.
readOnlyData 가상화 필드 수정
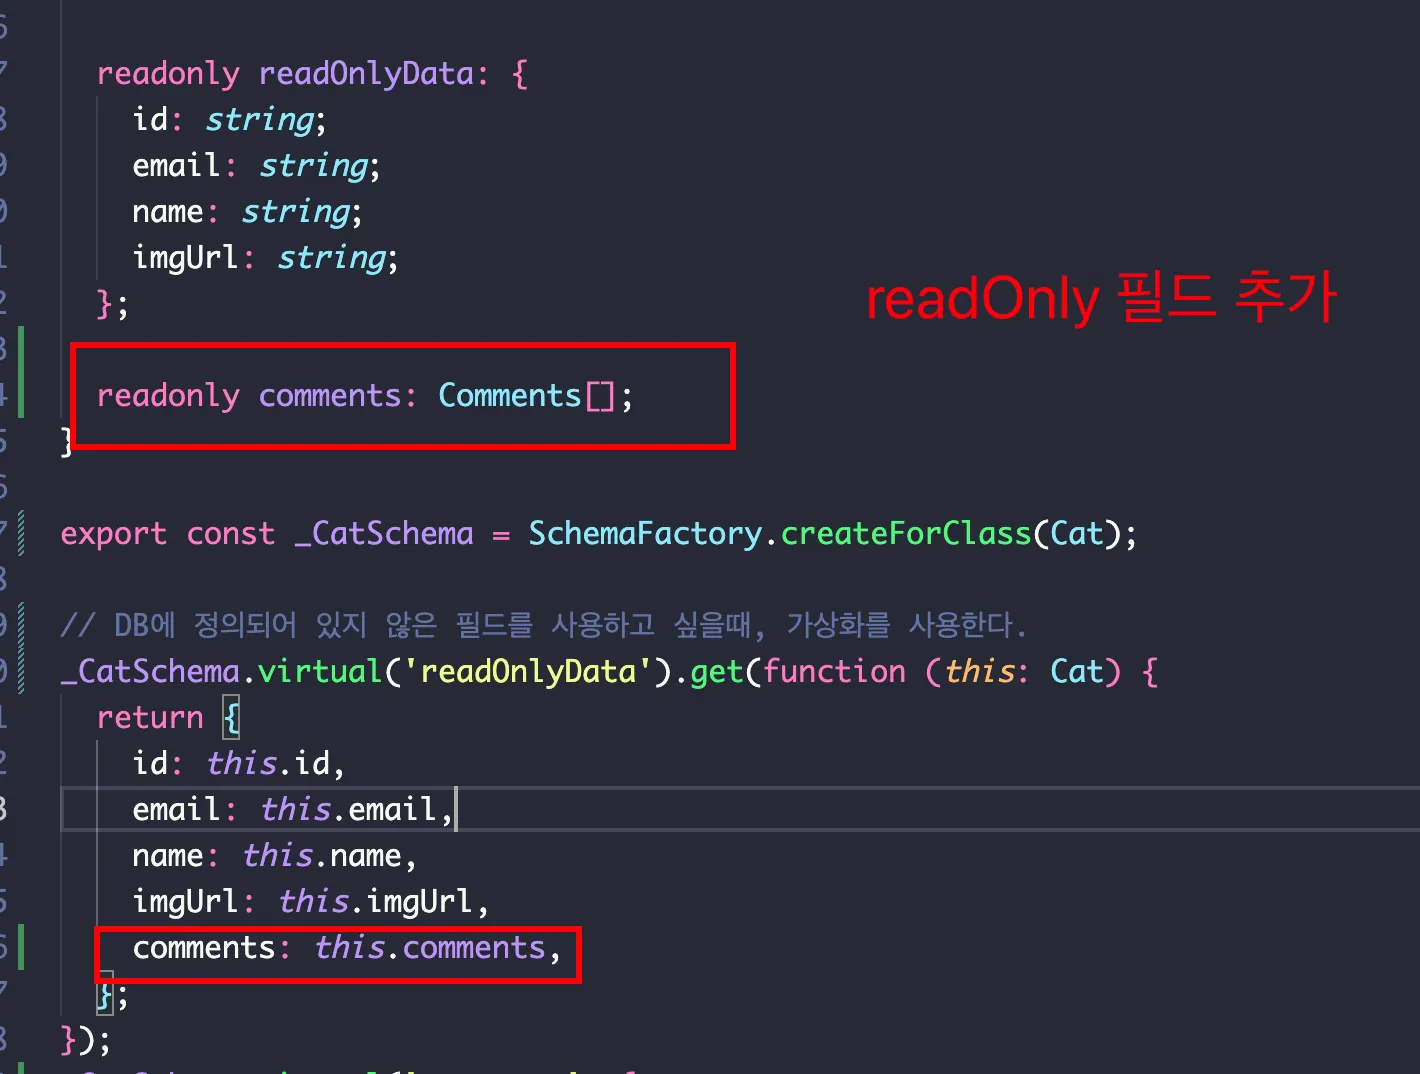
readOnly 필드를 추가해서, 반환 받는 readOnlyData 가상화 필드에 comments를 추가한다.
2.
catService.getAllCat 수정
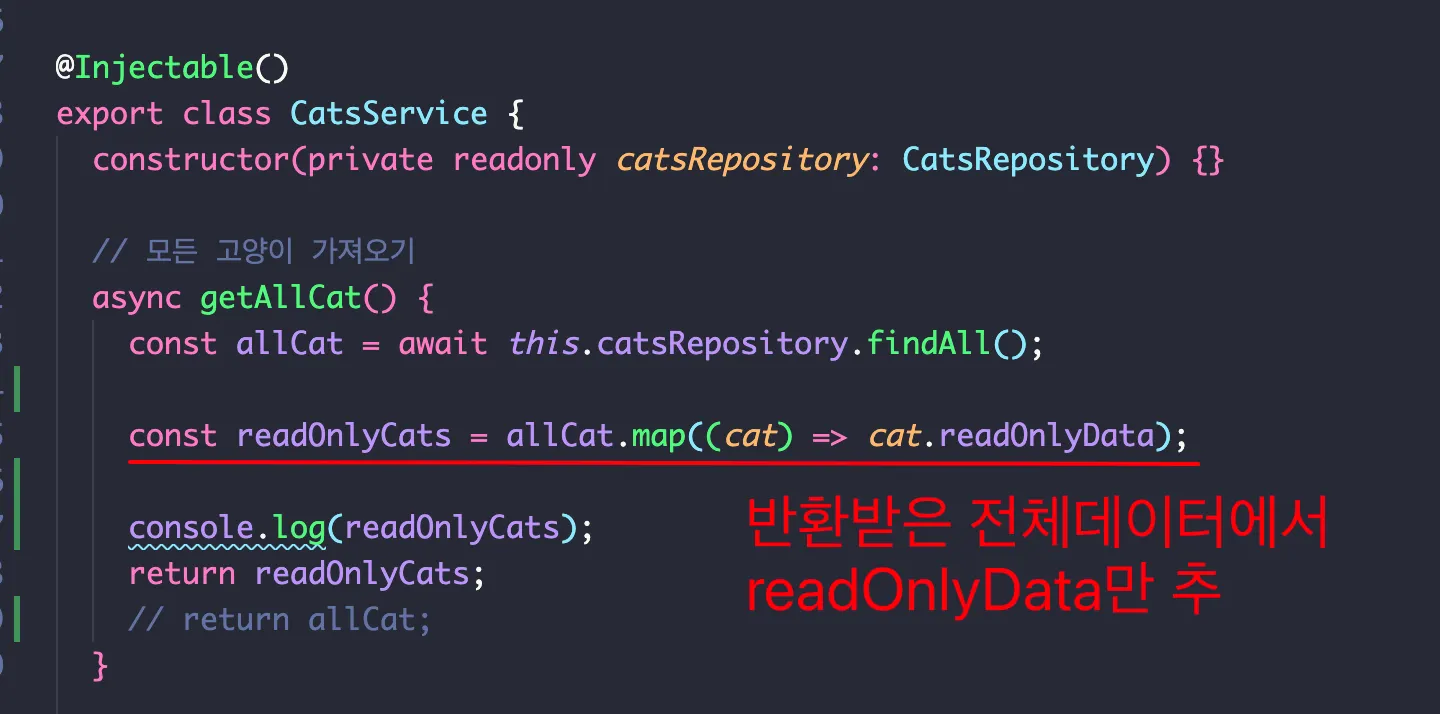
반환 받은 전체 데이터인 allCat에서
readOnlyData만 따로 추출
3.
확인
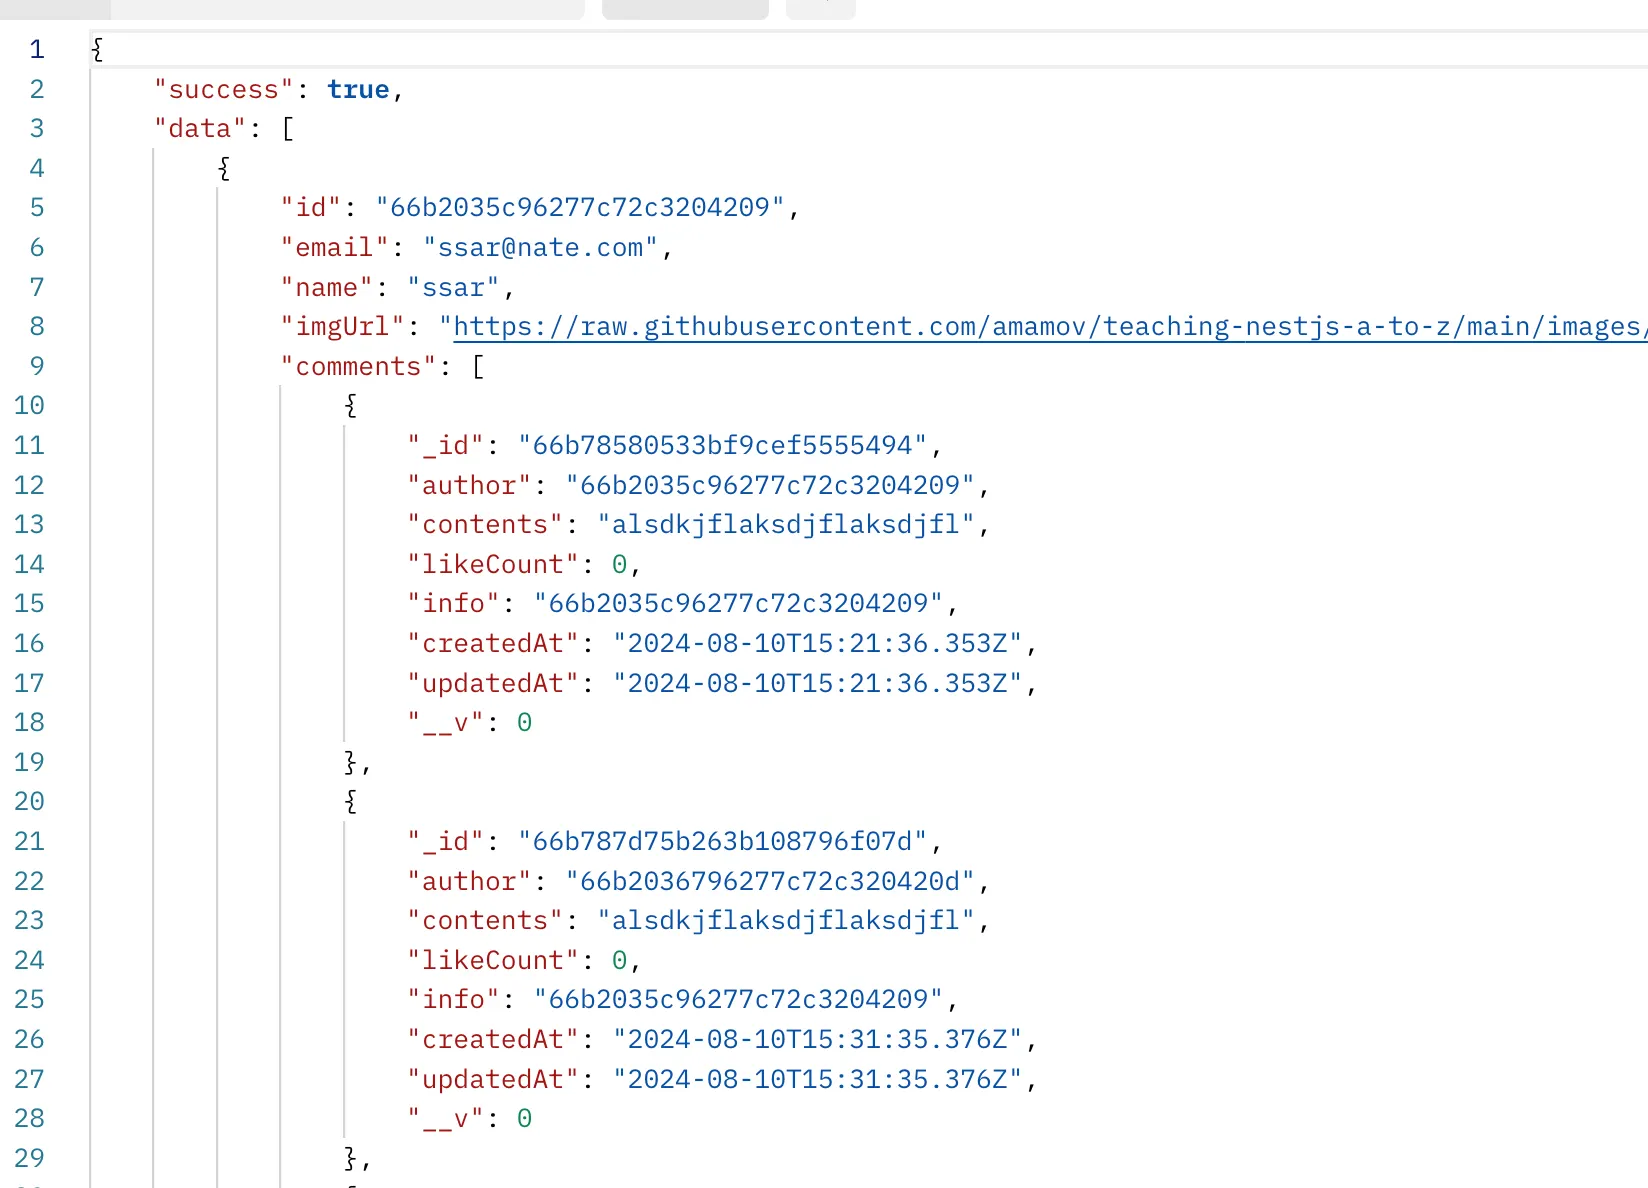
이렇게 우리가 원하는 모양의 데이터로 수정이 되었다.